Okay, so you know how sometimes you just *need* that fresh, crumbly goodness of queso fresco, but you don’t want to trek to the store? Or maybe you’re like me and get a little thrill from making things yourself? Well, get ready, because this Homemade Queso Fresco with Just 3 Ingredients is about to become your new best friend. Seriously, it’s ridiculously easy. I remember the first time I tried making cheese at home – I was a little intimidated, honestly! But this recipe? It’s so foolproof, it practically makes itself. You’ll be amazed at how simple it is to transform basic milk into this delicious, fresh cheese. The flavor is just so much brighter and cleaner than anything store-bought, and the texture is just perfect for crumbling over tacos or just munching on with some chips. It’s a kitchen game-changer!
Why You Will Love This Homemade Queso Fresco with Just 3 Ingredients
Honestly, this recipe is a lifesaver! Here’s why it’s so fantastic:
- Super Easy: Seriously, it’s almost impossible to mess this up.
- Crazy Fast: You can whip this up in under 30 minutes. Perfect for when you need cheese *now*.
- Minimal Ingredients: Just milk, lime juice, and salt. That’s it! No fancy stuff needed.
- Incredible Freshness: The taste is so much better than store-bought. So bright and clean!
- Totally Versatile: It’s great crumbled on everything from tacos to salads, or just enjoyed on its own.
The Magic of 3 Ingredients for Homemade Queso Fresco
You might be thinking, “How can just three things make cheese?” Well, that’s the beauty of it! Good quality whole milk is the star, providing all the creamy richness. Then, a splash of fresh lime juice is the secret magic, acting as a natural coagulant to separate the curds from the whey. A little salt just makes all those lovely flavors pop. Simple, pure, and delicious!
Essential Ingredients for Homemade Queso Fresco
Okay, so gathering your supplies is super simple for this homemade queso fresco. You really only need three things, and chances are you have most of them already! It’s kind of amazing how these simple ingredients come together. Here’s exactly what you’ll need to grab:
- 2 liters of whole milk – Don’t skimp here!
- 1/4 cup fresh lime juice – That’s about from 2 or 3 juicy limes.
- 1 teaspoon salt – Or a little more if you like it saltier!
Milk: The Foundation of Your Homemade Queso Fresco
This is probably the most important part, so listen up! You absolutely *have* to use whole milk. Seriously, don’t even think about using skim or low-fat milk. It just won’t work the same way. The fat in the whole milk is what helps it separate properly and gives the cheese that lovely creamy texture we’re going for. Using anything less is just asking for a sad, watery mess.
Lime Juice: The Natural Coagulant for Homemade Queso Fresco
This is the magic ingredient that makes the milk curdle! You’ll need about a quarter cup of fresh lime juice, which usually comes from squeezing 2 or 3 good limes. Make sure it’s fresh! Bottled stuff just doesn’t have the same oomph. You’ll add this slowly to the warm milk, and it’s what helps separate the solids (the cheese!) from the liquid. It’s so cool to watch it happen!
Salt: Enhancing the Flavor of Your Homemade Queso Fresco
A little bit of salt goes a long way here. It really wakes up the flavor of the cheese and makes it taste, well, like cheese! I usually start with about a teaspoon, but honestly, you can add more or less depending on what you like. Just give it a good stir after you’ve drained the cheese, and taste it. You can always add more!
How to Make Homemade Queso Fresco with Just 3 Ingredients: Step-by-Step
Alright, let’s get this cheese party started! Making your own queso fresco is honestly one of the most rewarding kitchen adventures, and it’s so much easier than you might think. Just follow these steps, and you’ll have delicious, fresh cheese in no time. It’s really about patience and watching the magic happen!
Preparing the Milk for Your Homemade Queso Fresco
First things first, grab your biggest pot – you’ll need a good, large one for all that milk. Pour in your whole milk and get it heating up over medium heat. Now, here’s the trick: you want it to get nice and steamy, right on the verge of boiling, but *don’t* let it actually boil over! Keep an eye on it and stir it occasionally so it doesn’t stick to the bottom. This usually takes about 10-15 minutes. You’ll see steam rising, and maybe little bubbles forming around the edges, but no rolling boil!
Separating the Curds and Whey for Homemade Queso Fresco
Once the milk is nice and hot, take that pot off the heat. Now for the fun part! Start adding your fresh lime juice, just a little bit at a time, and stir gently. You’ll want to watch closely because almost immediately, you’ll see the milk start to do its thing – it’ll separate into chunky bits (that’s your cheese curds!) and a watery liquid (that’s the whey). If it doesn’t separate right away, just add a tiny bit more lime juice and stir gently. It should happen within about 5 to 10 minutes. While that’s happening, get a colander ready and line it with a piece of cheesecloth or a fine-mesh sieve. Once the milk has separated, carefully pour the whole mixture into the lined colander. Let it drain for a few minutes.
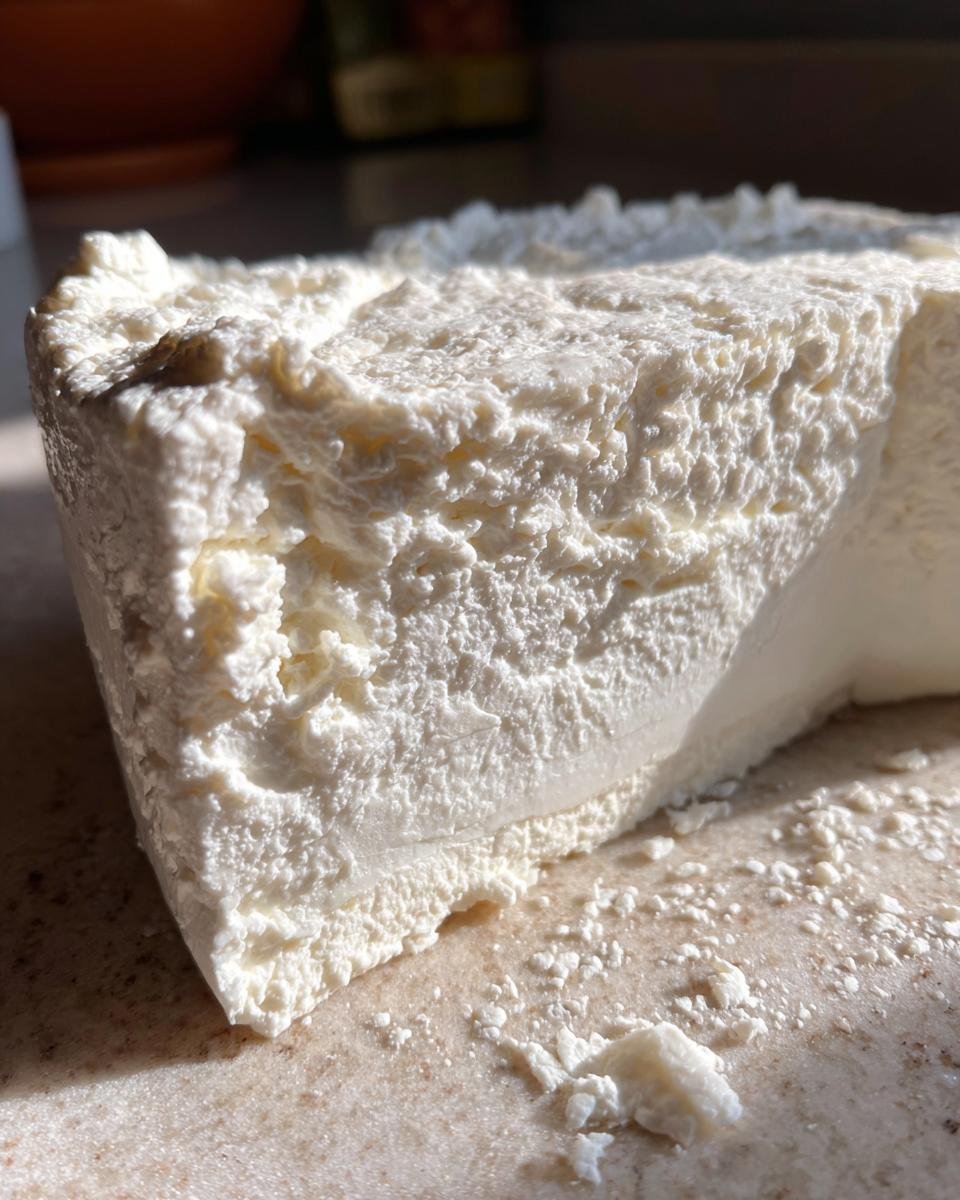
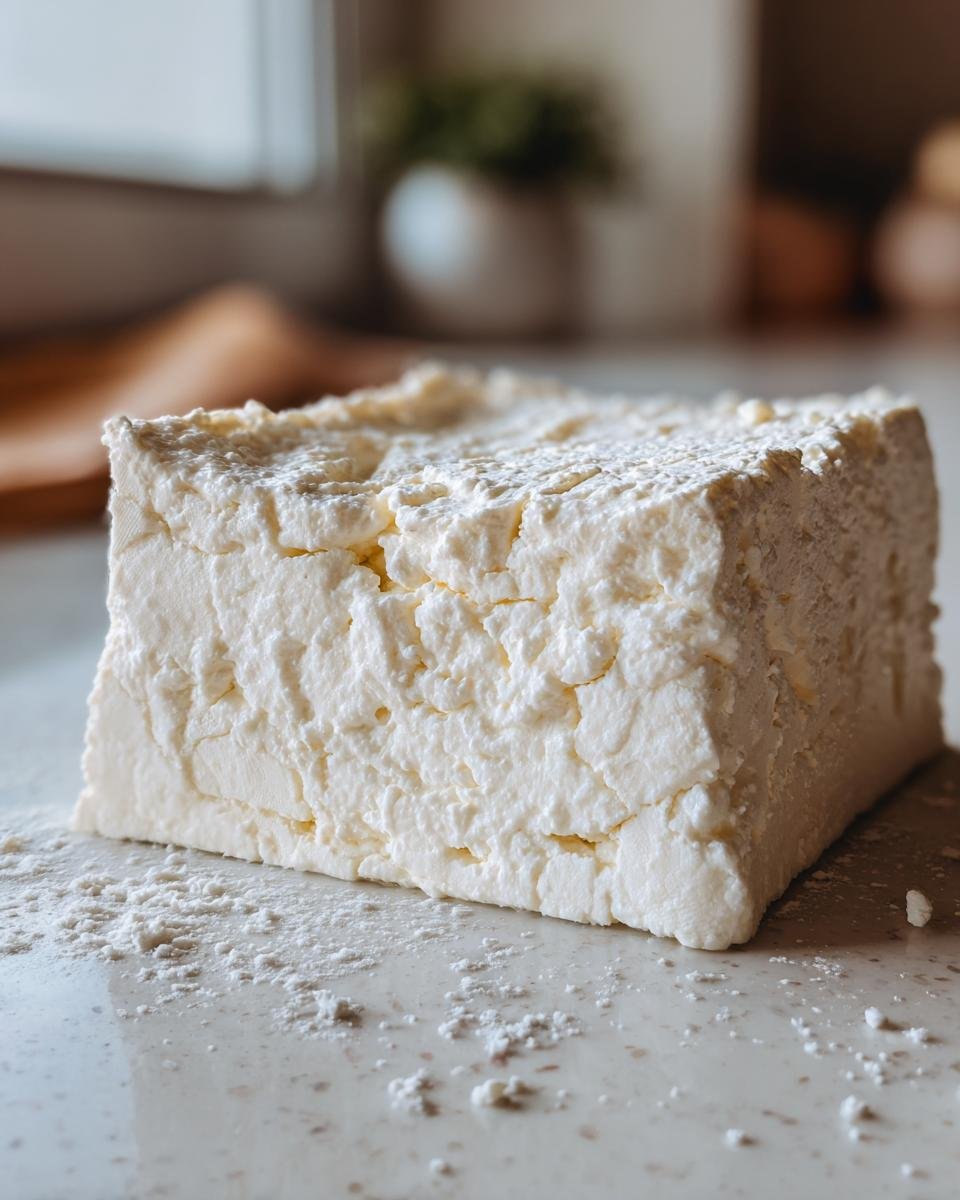
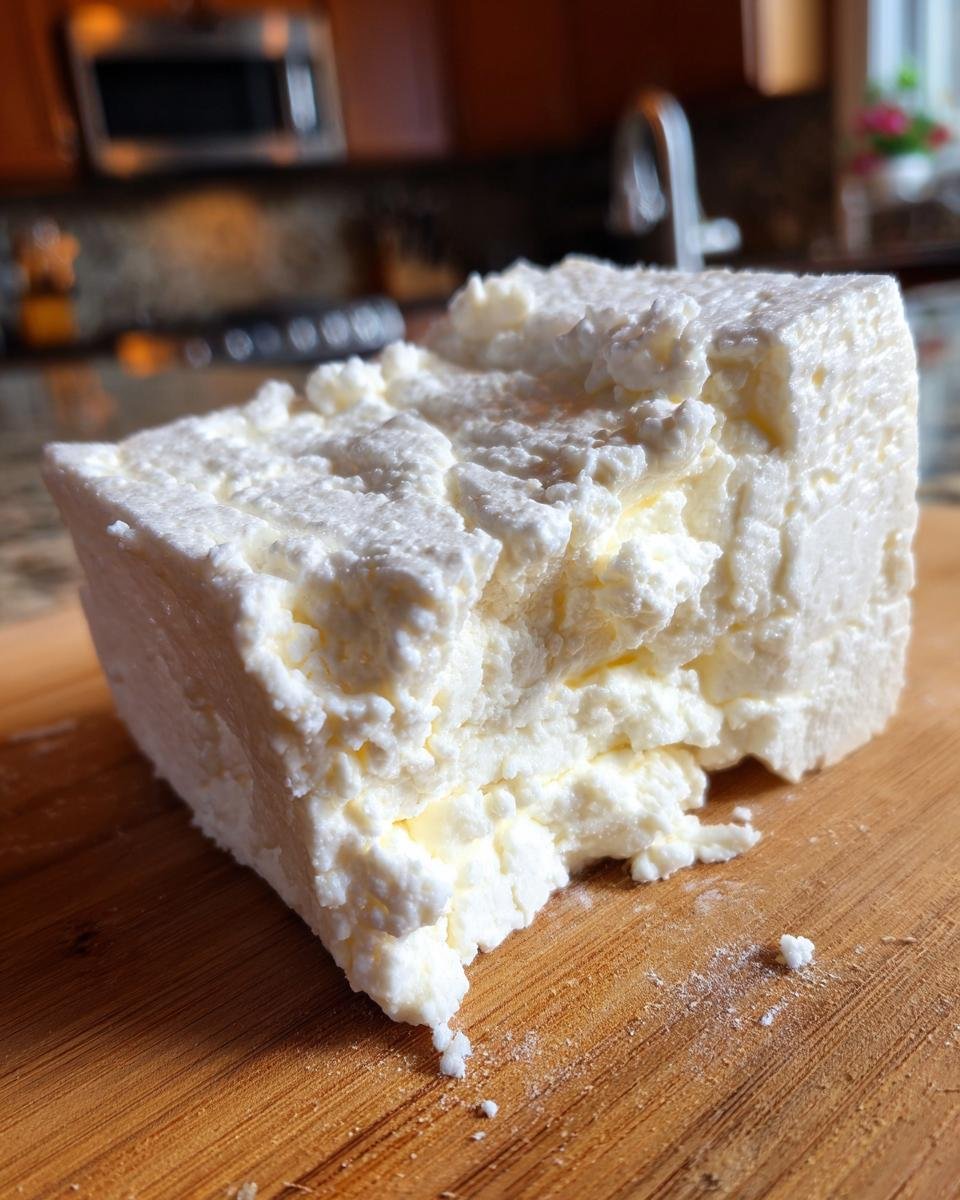
Shaping and Seasoning Your Homemade Queso Fresco
Now you’ve got your lovely cheese curds! Gently gather up the corners of your cheesecloth and give it a little squeeze to press out any extra liquid. Be careful not to squeeze *too* hard, or you’ll make it dry. You want it to be moist, not crumbly like feta. Then, just tip the cheese out onto a clean plate or cutting board. Sprinkle your salt over it and gently mix it in with a fork or your hands. If you want a firmer cheese, you can wrap it back up in the cheesecloth, place it in a small bowl, put something heavy on top (like a can of soup), and let it press in the fridge for about 30 minutes. Otherwise, it’s ready to go!
Tips for Perfect Homemade Queso Fresco
Making your own queso fresco really is a breeze, but a few little tricks can make it even better. When you’re straining those curds, don’t be tempted to wring them out like a dish towel! You want to be gentle. Just give them a soft squeeze to get rid of the excess liquid. If you squeeze too hard, your cheese can end up dry and chalky, and we definitely don’t want that. Trust me, a little gentleness goes a long way in keeping it wonderfully moist and crumbly. Also, really pay attention to that milk heating step – not too hot, not too cold, just perfect for the lime juice to do its thing. It’s all about that gentle separation!
Using the Whey from Your Homemade Queso Fresco
Don’t just toss that leftover liquid, the whey! It’s actually packed with protein and nutrients. You can totally use it in baking – think of it as a super-powered substitute for water or milk in bread or pancake recipes. It adds a nice little something extra!
Variations on Homemade Queso Fresco
While this basic homemade queso fresco is absolutely delicious on its own, you can totally jazz it up if you’re feeling adventurous! My favorite way is to stir in some finely chopped fresh cilantro or a little bit of finely minced jalapeño right after you mix in the salt. It gives it a nice little kick and a fresh herb flavor that’s just amazing. You could also try adding a pinch of cumin or a tiny bit of chili powder for a different vibe. Just remember to add these flavorings when the cheese is still warm and a bit sticky, right after you’ve drained it and before you shape it.
Serving Suggestions for Homemade Queso Fresco
Okay, so you’ve made this glorious homemade queso fresco, and now you’re wondering what to do with it? Oh, the possibilities are endless! My absolute favorite way is to just crumble it generously over my tacos or enchiladas. It adds this amazing fresh, tangy flavor that just takes everything to the next level. It’s also fantastic sprinkled over a big, fresh salad, or even just served with some warm tortilla chips for dipping. Sometimes, I even just eat little spoonfuls of it straight from the bowl when I’m making dinner – don’t judge!
Frequently Asked Questions About Homemade Queso Fresco
Got questions about making your own queso fresco? I’ve got answers! It’s totally normal to wonder about a few things when you’re trying something new, especially when it comes to cheese-making. Let’s clear up some common queries so your homemade queso fresco turns out perfectly every time!
What kind of milk is best for Homemade Queso Fresco?
You absolutely *must* use whole milk! Seriously, don’t mess with low-fat or skim milk. The fat is crucial for getting that good separation and the creamy texture you want in your homemade queso fresco. It’s the foundation!
How long does Homemade Queso Fresco last?
Since it’s so fresh, it’s best eaten within about 3 to 4 days. Just pop it in an airtight container in the fridge. It really doesn’t last too long because there aren’t any preservatives, but honestly, it’s so good you won’t have any trouble finishing it!
Can I use lemon juice instead of lime juice for Homemade Queso Fresco?
You can, but lime juice is definitely preferred! Lime juice has a slightly more distinct tangy flavor that works beautifully with the cheese. Lemon juice will work to separate the milk, but the taste might be a little different. Stick with lime if you can!
Nutritional Information for Homemade Queso Fresco
Just a little heads-up, the nutritional info for homemade queso fresco can vary a smidge depending on exactly what you use, but here’s a general idea per serving (about 50g). It’s around 120 calories, with about 8g of fat, 7g of protein, and 6g of carbs. It’s a tasty way to add some fresh flavor without going overboard!
Print
Blitzschnelles Homemade Queso Fresco mit 3 Zutaten
- Total Time: 30 Minuten
- Yield: ca. 250-300g
- Diet: Vegetarian
Description
Einfaches Rezept für Queso Fresco mit nur drei Zutaten.
Ingredients
- 2 Liter Vollmilch
- 1/4 Tasse frischer Limettensaft (ca. 2–3 Limetten)
- 1 Teelöffel Salz (oder nach Geschmack)
Instructions
- Gießen Sie die Milch in einen großen Topf.
- Erhitzen Sie die Milch bei mittlerer Hitze, bis sie kurz vor dem Kochen ist (sie sollte dampfen, aber nicht kochen). Rühren Sie gelegentlich um, damit sie nicht anbrennt.
- Nehmen Sie den Topf vom Herd. Geben Sie nach und nach den Limettensaft hinzu und rühren Sie vorsichtig um.
- Warten Sie, bis die Milch beginnt, sich zu trennen und Klumpen (Käsebruch) bildet. Dies sollte innerhalb von 5-10 Minuten geschehen. Wenn nicht, fügen Sie noch etwas Limettensaft hinzu.
- Legen Sie ein Käsetuch oder ein feines Sieb über eine Schüssel. Gießen Sie die getrennte Milch durch das Tuch/Sieb, um den Käsebruch von der Molke zu trennen.
- Drücken Sie vorsichtig überschüssige Flüssigkeit aus dem Käsebruch.
- Geben Sie das Salz hinzu und mischen Sie es gut unter.
- Formen Sie den Queso Fresco nach Belieben und lassen Sie ihn abkühlen.
Notes
- Verwenden Sie keine fettarme oder entrahmte Milch, da dies die Ergebnisse beeinträchtigt.
- Die Molke kann für andere Zwecke verwendet werden, z. B. zum Backen.
- Prep Time: 10 Minuten
- Cook Time: 20 Minuten
- Category: Käse
- Method: Kochen
- Cuisine: Mexikanisch
Nutrition
- Serving Size: ca. 50g
- Calories: 120 kcal
- Sugar: 6g
- Sodium: 150mg
- Fat: 8g
- Saturated Fat: 5g
- Unsaturated Fat: 3g
- Trans Fat: 0g
- Carbohydrates: 6g
- Fiber: 0g
- Protein: 7g
- Cholesterol: 25mg
Keywords: Queso Fresco, Frischkäse, Käse selber machen, Tex-Mex, Einfaches Rezept